
Monday, February 28, 2011
Testing of the Side Art Animations


Need to pick up some yellow LEDs to complete the effect. But here is the side art and some pics to show you some of the areas I plan to animate. The arduino arrived from mouser today so I will start to program that for the effects, and also look into how to connect the LEDs to the board as there are unfortunately no screw down connectors on it.
Another LED Test
iPhone camera photos don't really do the effect justice, I find the iPhone makes the LED look like it overpowers the decal. Here is a picture with a better camera that shows how you still get a lot of the detail and the image is not overpowered by the LED light.


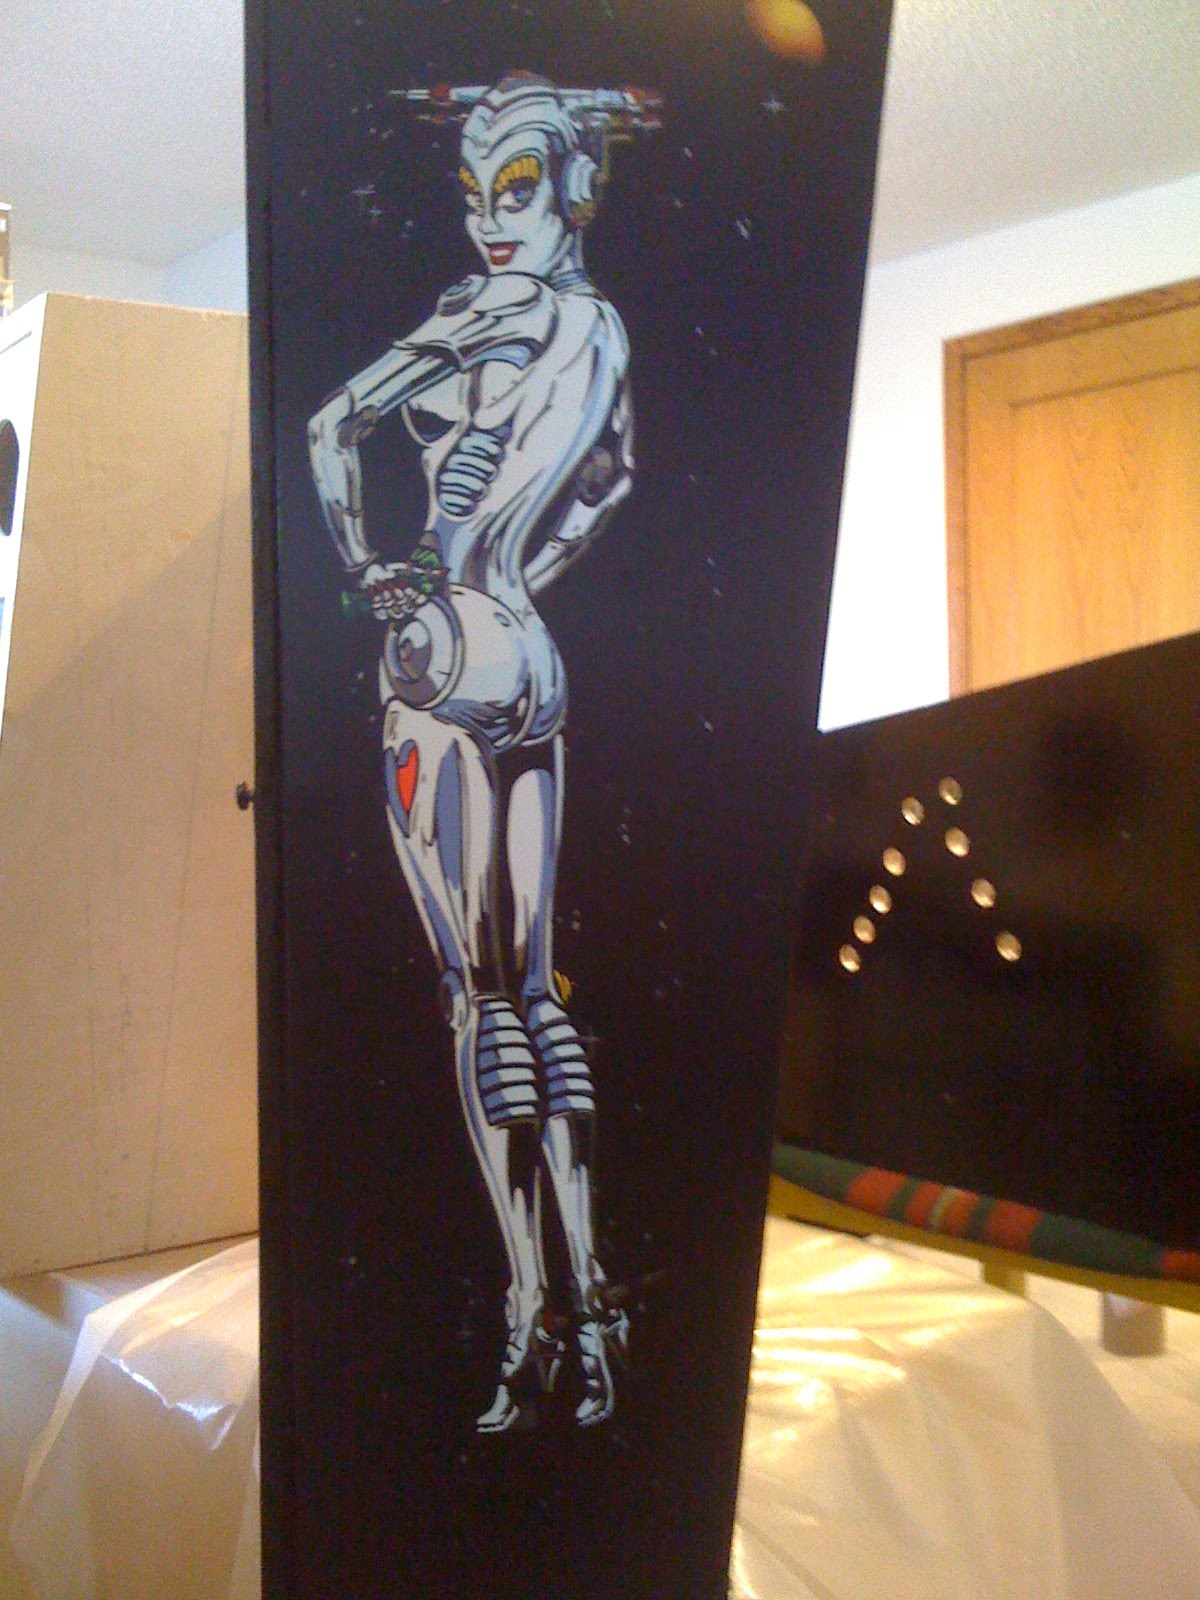
Sunday, February 27, 2011
Pucks Installed in Cabinet Sides
Here is a pic of the installed pucks, the LEDs will sit in here for the cabinet animations I am doing. For the smaller lights like eyes and stars I am using just a piece of acrylic rod that is about the width of a LED.
These are installed so that the decal will sit flat and also to help diffuse the light as just having a LED behind the sticker didn't look very good.

Decals Installed on Back Box
Haven't got all the decals installed yet, but installed the back box ones now and am testing the lights. Ordered the Arduino to control the LEDs, it will control 64 outputs individually, I think all told I'll have about 30 to control.


 Here are a couple of pics, you can see the heart animated, and also I played around with different color LEDs for the eyes. Going to go with blue and may work to make sure the LED does not go outside the lines, or at least dial the intensity down a bit so you can still see some of the decal and its not jsut a bright light.


 Here are a couple of pics, you can see the heart animated, and also I played around with different color LEDs for the eyes. Going to go with blue and may work to make sure the LED does not go outside the lines, or at least dial the intensity down a bit so you can still see some of the decal and its not jsut a bright light.
Tuesday, February 22, 2011
Pinball Cabinet Primed


Here is the primed pinball cabinet, used a special primer that from the Matador Line of paint that really covered well. Can't see any wood grain at all.
Will put on the finishing coats tomorrow. You can see an image of the LED pucks installed also.
Sunday, February 20, 2011
Acrylic Pucks for LED side Art Animation


Here are some pictures of the process to create the acrylic pucks that will be used to dffuse the light and flush mount the LEDs into the side of the cabinet so they can be animated to highlight parts of the artwork.
Thursday, February 17, 2011
Cabinet Side Art LED Animation


Started working on the cabinet side art animation, here are some acrylic discs that I will use to create larger LED lighting for areas requiring it. For eye lighting and other smaller details, I will be using smaller diameter rods about the width of the LED.
Sunday, February 13, 2011
Saturday, February 12, 2011
LED Wiring Harness

Here is a picture of the quick connector that each LED is wired to.
All three LEDs are run to the backbox as part of one harness.
LED Rom Flasher Test

Here is a shot of the flashers in action. Running the Addams Family game in this picture, LEDs throw a lot of light and create nice patterns with the flasher caps.
LEDs aren't properly mounted in this pic, but now that everything is working I can properly install them.
Another picture with Pin Bot running. I'll post a video shortly so you can see the full effect, but you get quite a few different colors during game play. LEDs are running on 5 volts.

LEDs Installed with Resistors

Here is an image of the LED properly mounted to the heat sink now with the appropriate resistors. In order to maximize the current for each different colored LED I am running a different resistor based on my LED findings listed on this site. The actual measures were a far cry from the theoretical or calculated ones.
I'll hot glue the resistors and then drill holes in the back of the backbox for these to be installed. They are wired to connectors for easy removal.
Thursday, February 10, 2011
CREE LEDs by Different Color at Various Voltages
LED current / voltage comparision test using 5 volt source
results R val
Red 2.01/450 5.6 ohm Red 2.05 /320 7.2 ohm
Green 3.7 /305 4.5 ohm Green 3.0 /220 7.2 ohm
White 3.4 /275 4.5 ohm White 3.27/195 7.2 ohm
Blue 3.2 / 3.25 4.5 ohm Blue 3.0/225 7.2 ohm
Red 2.06/360 6.6 ohm Red 3.2/300 8.2 ohm
Green 3.2 /240 6.6 ohm Green 3.0/200 8.2 ohm
White 2.2 /314 6.6 ohm White 3.25/180 8.2 ohm
Blue 3.0 /240 6.6 ohm Blue 3.0/205 8.2 ohm
LED spec at 350ma
Red 2.1 /350 ma
Green 3.4 / 350ma
Blue 3.2 / 350ma
White 3.2 / 350ma
Green 3.4 / 350ma
Blue 3.2 / 350ma
White 3.2 / 350ma
Wednesday, February 9, 2011
Testing LEDs

Installed a couple of multimeters inline with the LEDs. One was set to measure the voltage, and the other the current or amperage.
Found that the Red LED drew the most current, was typically double what the other LEDs drew.
At 3 Volts I'm not getting much intensity out of the LEDs, only see about 110 mA out of the white LED. Still very bright, but will try and run this one using a 5 Volt power supply and resistor.
LED Heat Sinks

Ordered the heat sinks for the LEDs, here is a picture of them. Experimented with various currents, at 3 volts the CREE LEDs are not drawing a lot of current, I am only seeing about 120 mA for the GBW, and about 300 for the Red.
Red is currently much brighter. Tomorrow I'll experiment with 5 volts although even at only 150 or so mA they are still quite bright.
They can handle up to 700 mA though, so can probably squeeze some more brightness out of them.
Tuesday, February 1, 2011
Flasher LED Holders
Was looking into how to mount my flasher LEDs, here is a really cool setup. http://ca.mouser.com/Tyco_StarBoard/
Basically allows you to take your star LED boards and mount them without the need for any thermal adhesive, and no soldering.
I like this option as it would be a very clean look, and I hate hard wiring anything incase it breaks down the road. with this you can just unscrew the cover and remove the LED, you can even install different diffuser lenses if you like. Other great thing is the wires just clip on to the sides, so even the wires aren't hard mounted to the heat sink or the LED.
Unfortunately I couldn't find this setup for RGBW or four color LEDs, they seem to only make it for 3. On my next cab I am definately just going to go with RGB LEDs and these mounts, and if I feel the need for white light maybe get a strobe.
Subscribe to:
Posts (Atom)